
 Pin it
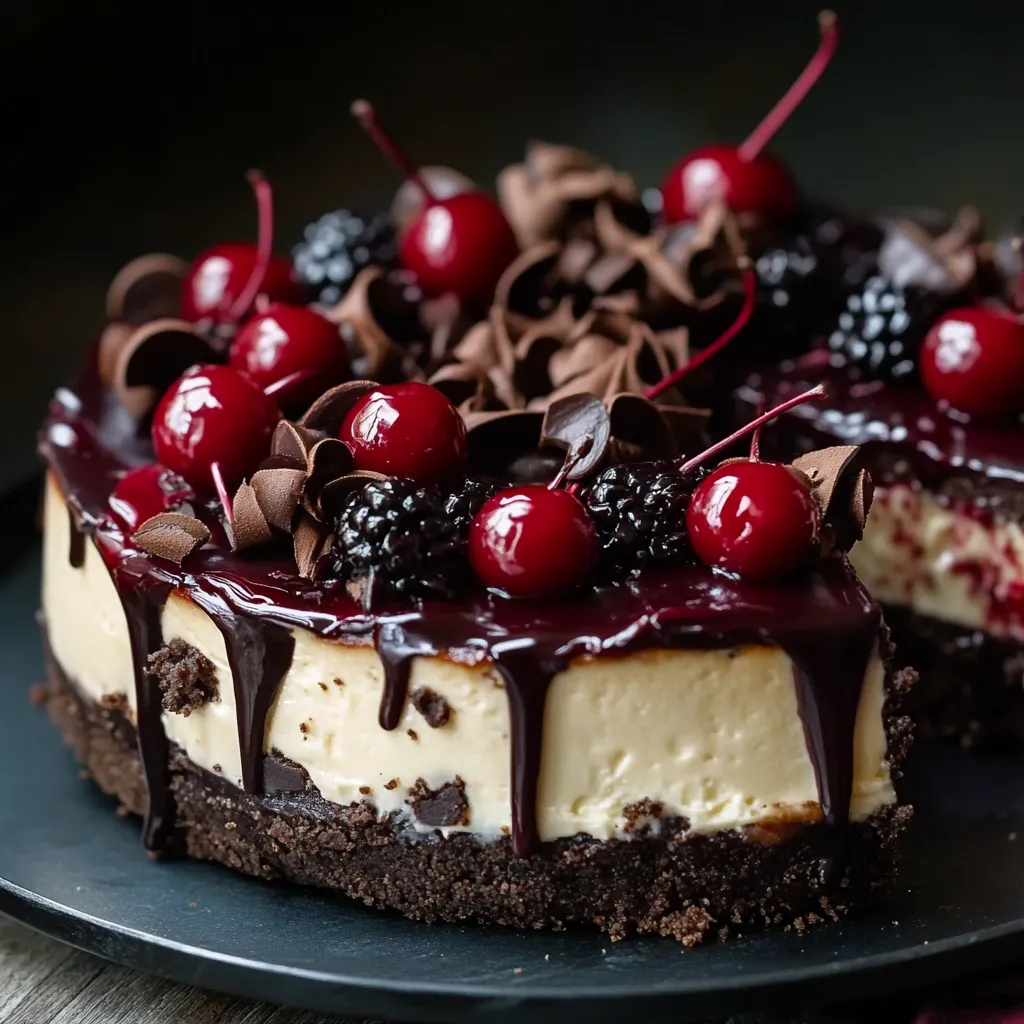
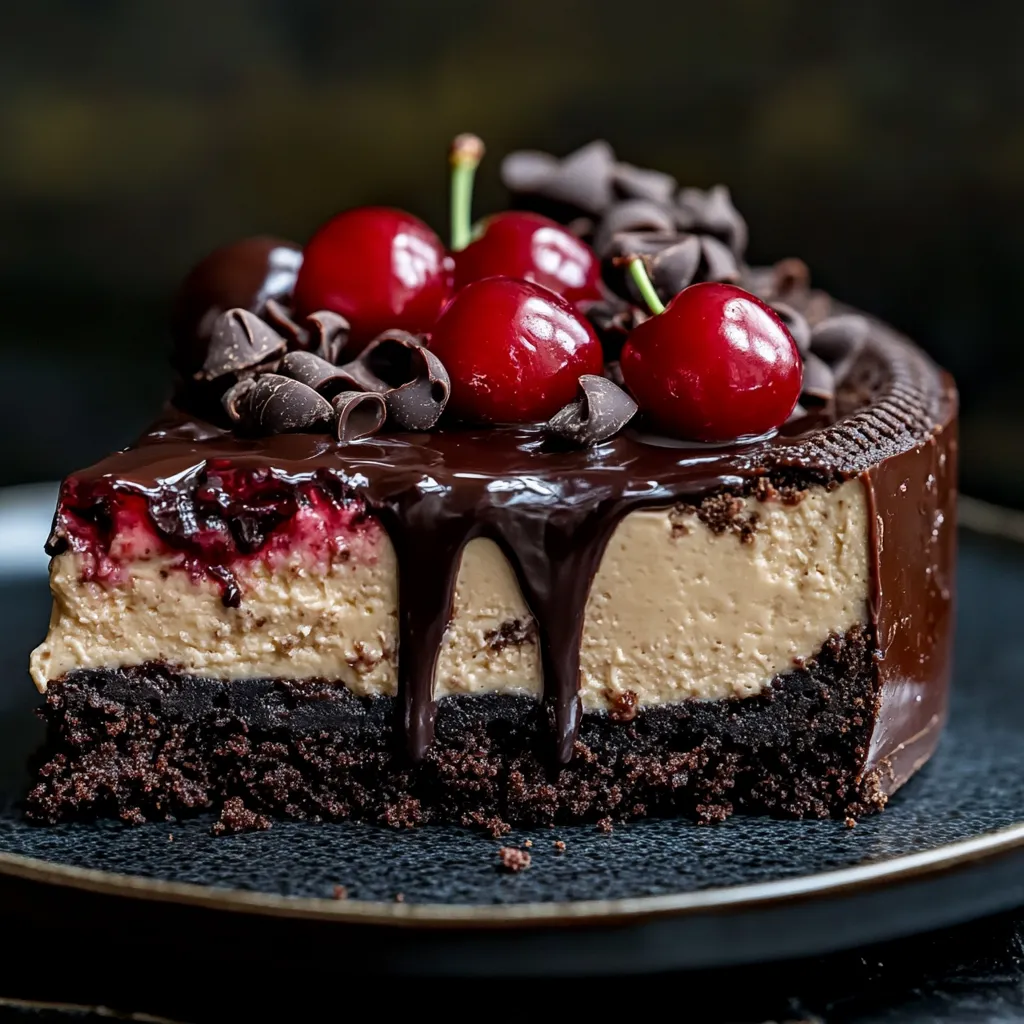
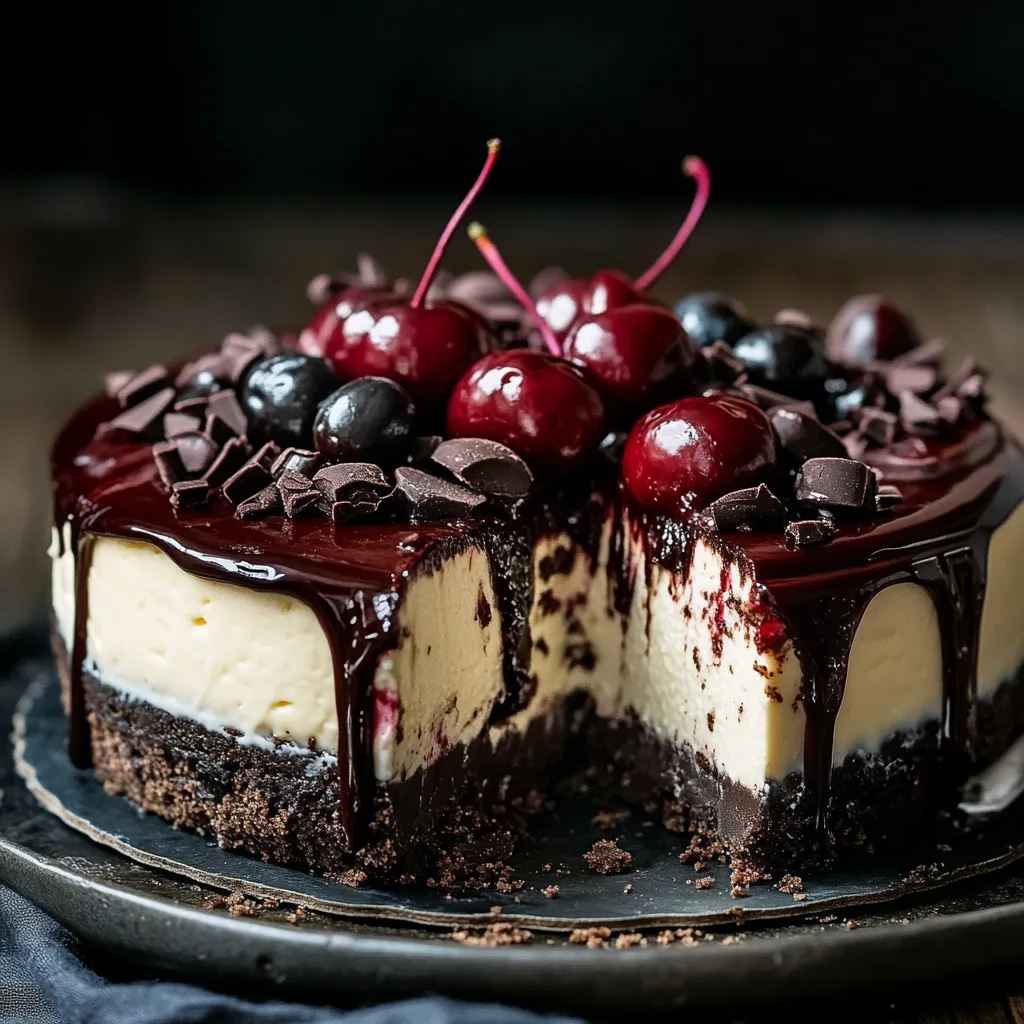
When you cut into this Black Forest Cheesecake, you'll instantly realize you've made something extraordinary. This treat stands out by blending the deep richness of chocolate with tangy cherries, all tucked inside a velvety cheesecake base. I've spent countless hours tweaking this in my home kitchen, and now it's the dessert everyone begs me to bring to gatherings.
What Makes This Treat Special
I came up with this dessert during a stormy day when I mixed my mom's traditional cheesecake with my grandma's favorite Black Forest cake. What came out of the oven was better than I'd hoped, and it's now what my family expects at every celebration.
Key Components
- Full-fat cream cheese: Don't go low-fat if you want truly creamy results
- High-fat European butter: Makes a more dependable and tasty crust
- Good chocolate biscuits: They create the base of your amazing dessert
- Top-notch cherries: The highlight of any Black Forest creation
- Dutch-process cocoa: Gives a more intense chocolate background
- Thick whipping cream: The secret to getting that dreamy texture
 Pin it
Step-by-Step Guide
- Get Everything Ready (1 hour ahead):
- Let cream cheese, eggs, and sour cream sit out until they're room temp. Be exact with measurements since precision matters. Get your springform pan ready with grease and parchment paper.
- Make Your Crust (20 minutes):
- Crush chocolate cookies into tiny bits. Stir in melted butter until it looks like damp sand. Press firmly across the bottom of pan. Bake briefly until it smells good and feels set.
- Mix Your Filling (30 minutes):
- Whip cream cheese until completely smooth. Slowly add sugar so it blends perfectly. Drop in eggs one by one, mixing just enough. Gently fold in your melted chocolate.
- Bake It Right (1 hour 10 minutes):
- Set up a water bath for even cooking. Wrap your pan carefully so water stays out. Keep an eye on temp as it bakes. It's done when the middle jiggles slightly.
- Cool Properly (4-6 hours):
- Let it sit in the turned-off oven with door open for an hour. Cool on rack until it hits room temp. Chill in fridge before finishing. Top with cherries just before you serve.
 Pin it
Important Notes
I'll never forget when my super picky aunt asked for my recipe after trying this cheesecake at our family dinner. That's when I knew I'd created something truly worthwhile.
Creating Perfect Smoothness
After tons of attempts, I've found that getting that dreamy texture comes down to time and temp. Everything needs to be exactly room temperature - I even put my eggs in warm water for 10 minutes before I start. These small details transform an ordinary dessert into something amazing.
Water Bath Tricks
Getting the water bath right took forever to figure out. Now I wrap my springform in three layers of thick foil that go well above the sides. The water should come halfway up the pan - any more might leak in, any less won't give enough moisture while baking.
Cherry Selection Tips
Good quality canned filling works fine, but I really love making my topping from scratch using fresh or frozen cherries. I cook them down with a bit of sugar, real vanilla, and a splash of cherry liqueur until they look shiny and gorgeous. Their tartness works so well with the rich cake underneath.
Working With Chocolate
Each type of chocolate adds something unique. For the base, I mix dutch cocoa with cookie crumbs for better flavor. The filling gets both melted dark chocolate and a bit of powder, while I finish the top with curls of semi-sweet chocolate.
Changing With The Seasons
In hot months, I go lighter by using more fresh cherries and cutting back on chocolate. During winter, I lean into richer flavors with extra chocolate and warm ganache drizzled on top. The basic recipe works great all year round.
Keeping It Fresh
Good storage keeps every piece tasting fresh. I've learned that putting a paper towel on top before covering absorbs moisture and keeps the surface looking perfect. When I freeze it, I cut it first so I can thaw just what I need.
Fixing Common Problems
Issues like cracks or uneven cooking usually happen because of temp changes. If the top browns too fast, cover it loosely with foil. Seeing a crack start? Turn your oven down 25 degrees and bake a little longer.
Prep Ahead Benefits
This dessert actually tastes better after a day or two in the fridge as flavors meld together. I often make it two days before I need it. Just don't add the cherry topping until a few hours before serving to keep everything looking fresh.
 Pin it
Tools That Help
Having the right gear really matters. A good springform pan, sturdy mixer, and proper spatulas make a huge difference. I actually keep one rubber spatula just for cheesecakes - it doesn't touch any other food!
Smart Baking Advice
- Keep that oven door closed during the first hour of baking
- Run filling through a strainer for ultra-smooth results
- Use separate measuring tools when working with chocolate
- You can tell it's done by the sound it makes when tapped gently
My Closing Thoughts
After making this Black Forest Cheesecake countless times, I've realized patience truly matters most. From letting ingredients warm up properly to waiting for the final cooling, every bit of extra time leads to better flavor. This isn't just a list of ingredients - it's a blend of tradition, skill, and the pure joy of making something that'll wow everyone at the table.
Frequently Asked Questions
- → Can I skip using a water bath?
- You can, but it helps keep the texture smooth and prevents cracking. Without it, bake at 300°F for a bit longer.
- → How do I tell if the cheesecake is ready?
- The edges should look set while the middle stays slightly wobbly. It will firm up as it cools.
- → Can I swap canned cherries for fresh ones?
- Totally! Just cook pitted fresh cherries with some sugar and a bit of cornstarch. 4 cups should do.
- → How long can I store this cheesecake?
- It keeps fresh in the fridge for around 5 days or freezer-safe for up to 2 months.
- → Is this a good dessert to prepare ahead?
- Yes! Since it needs hours to chill, you can make it 1-2 days beforehand.