
 Pin it
DIY Corned Beef turns plain brisket into juicy homemade deliciousness that links you to old-school food saving techniques. The real wonder comes during the brine soak, when basic meat becomes something special—soft, tasty, and ready for anything. You'll find the wait totally worth it when you taste how different it is from store options.
I started making this after looking for something fancy but doable for weekend guests. After trying different kinds of shrimp and playing with butter amounts, this version became our family favorite. My husband swears they're the tastiest scampi ever, and now everyone asks for them whenever they come over.
Key Ingredients and Smart Shopping Advice
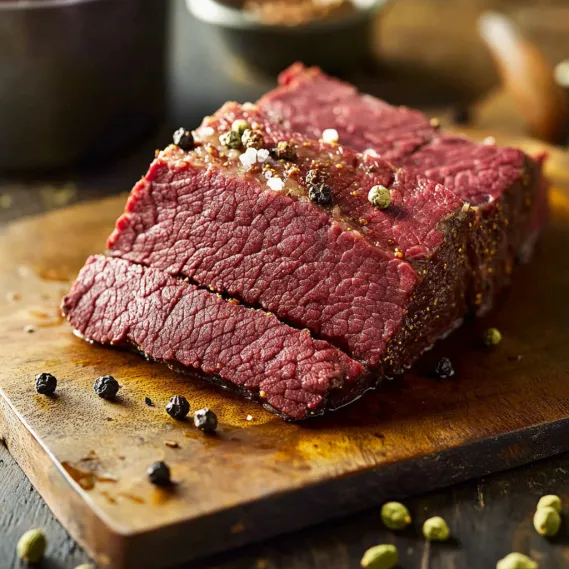
- Beef Brisket: Go for pieces with good fat streaks; flat cuts slice more evenly, point cuts pack more flavor
- Kosher Salt: Always weigh it since different brands come in varying crystal sizes
- Pink Curing Salt: Creates that classic pinkish color and helps food stay fresh longer
- Pickling Spices: Making your own mix lets you adjust flavors to your taste
- Brown Sugar: Cuts through saltiness and encourages good bacteria growth
I've noticed that throwing in a bit of chicken powder (like bouillon) really makes the difference in getting that genuine takeout taste. Don't have any? Try mushroom powder instead – it adds the same rich depth without changing how the dish tastes overall.
Step-by-Step Cooking Guide
- Step 1: Build Your Custom Spice Mix
- Lightly brown allspice berries, mustard seeds, coriander seeds, red pepper flakes, peppercorns, cloves, and cinnamon pieces. Crush them up and add bay leaves and ginger for richer aroma.
- Step 2: Mix Up the Brine
- Stir water, kosher salt, pink curing salt, brown sugar, and your spices together. Heat until everything dissolves, cool it down completely, then stick it in the fridge.
- Step 3: Soak the Meat
- Put your brisket in the cold brine using a non-metal container. Keep in fridge for 5-7 days, turning once daily for even curing. Use something heavy to keep the meat underwater the whole time.
- Step 4: Check and Get Ready to Cook
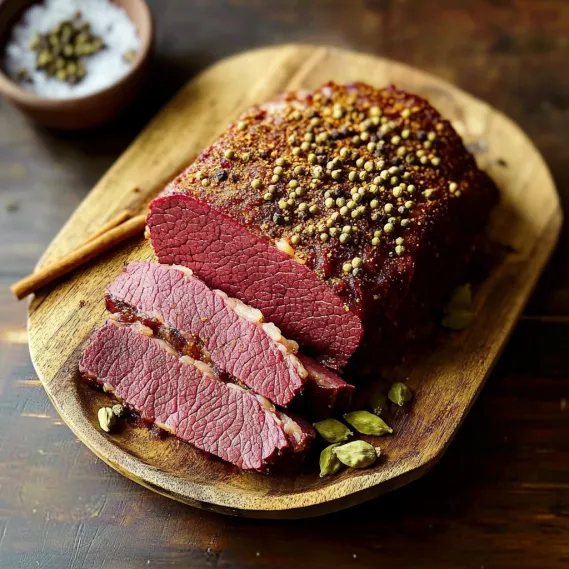
- Wash the brisket well under cold water. Snip a small piece off the corner to make sure it's cured right – it should look pink with curing salt or grayish without it.
- Step 5: Cook Until Perfectly Soft
- Put the brisket in fresh water with leftover pickling spice. Get it boiling, then turn down to simmer for 3 hours until it's fork-soft. Let it rest before cutting across the grain.
 Pin it
When I first tried making this, I learned you can't rush good curing. I cut the soaking time short and ended up with tough, barely cured brisket. Now I make sure to give it a full overnight soak, which creates that melt-in-your-mouth texture and deep flavor.
The Fascinating Chemistry Behind Curing
Salt pulls water from meat through osmosis while soaking into the fibers, making a place where bacteria can't thrive. Sodium nitrite works with myoglobin in the meat, giving it that special color while boosting taste and stopping spoilage. This old method changes both how meat feels and tastes.
 Pin it
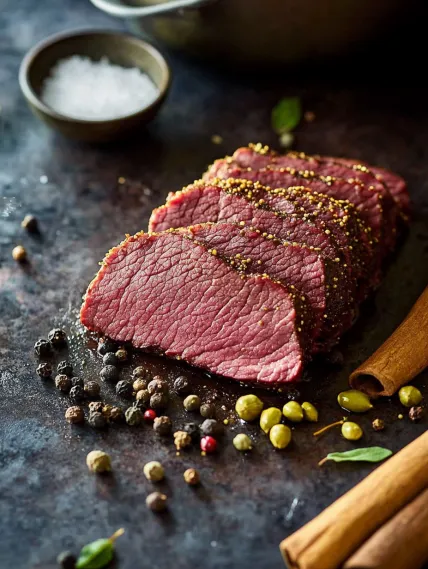
Crafting Your Personal Flavor Blend
Try adding cinnamon for cozy warmth, orange peel for zesty freshness, juniper berries for subtle pine flavor, or mace for a nutmeg-like kick. Each addition creates your own special taste while keeping the basic character. You can make extra spice mix ahead and keep it for months.
Enjoying It Beyond March 17th
Make Reuben sandwiches with tangy sauerkraut, chop it up for breakfast hash with potatoes, or stuff tacos with it plus pickled cabbage and creamy horseradish sauce. The rich, spiced flavors work surprisingly well in lots of different dishes.
Fixing Common Problems
If your meat tastes too salty, soak it in cold water before cooking. Tough meat just needs more time to break down the connective tissue. Without pink salt, your meat will look gray instead of pink, but will taste just as good.
 Pin it
Smart Cooking Tricks
- Cook on low heat for a long time, then let it rest wrapped in foil to stay juicy
- Switch some water for dark beer to get deeper flavor notes
- Boil down the cooking liquid to use when warming up leftovers
- Keep the broth for cooking traditional side veggies
- Store your cooked meat with some of the cooking juice so it won't dry out
Frequently Asked Questions
- → Do I really need pink curing salt for this?
- You don’t have to use pink curing salt, but it does two things: gives corned beef its red color and keeps bacteria from forming while curing. Skip it, and your corned beef might turn brown instead. If leaving it out, make sure to keep the meat refrigerated while curing.
- → Is brisket the only cut I can use?
- Brisket is the go-to because it’s fatty and tender when cooked, but you can substitute beef round or chuck roast. These have slightly different textures but still work. Go for cuts with marbling for better flavor.
- → What happens if my corned beef comes out too salty?
- If it’s too salty, soak the meat in cold water before cooking, swapping the water every hour. Or, during cooking, use more water and skip salting any veggies. Keep notes to adjust salt or brining next time.
- → Can I toss veggies in while it cooks?
- Sure can! Add cabbage, carrots, or potatoes during the last 30 minutes of simmering. They’ll soak up all that spiced goodness. Reduce the broth a bit after straining for a flavorful sauce.
- → How do I make my corned beef silky soft?
- Cook it low and slow, just barely simmering, so it doesn’t toughen. A slow cooker works wonders, taking 8–10 hours. Or try a pressure cooker for tender meat in about 90 minutes. Slice against the grain for extra softness.