
 Pin it
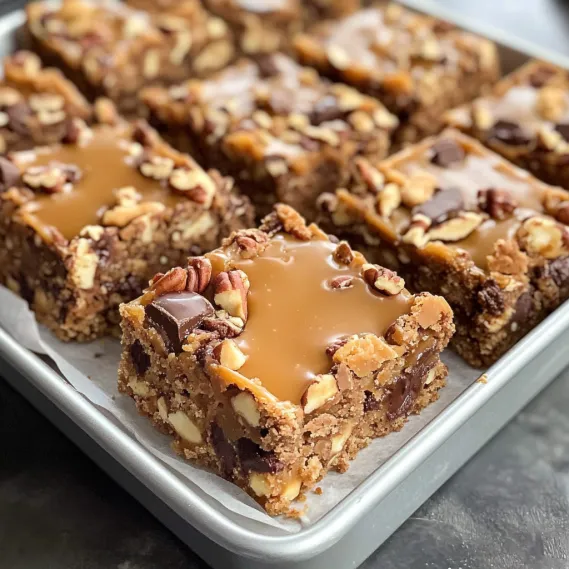
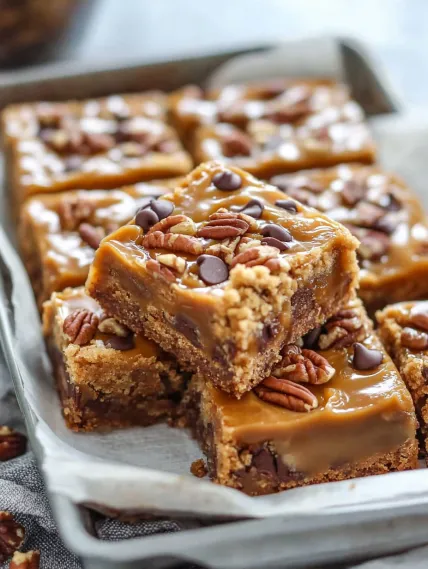
These tempting layered treats feature a soft cookie bottom with sticky caramel, chocolate chips, and a touch of peanut butter creating an amazing dessert that matches its daring name. The mix of different textures and tastes makes an addictive snack that'll wow at any event. I got this recipe at a local block party and just had to get the details after my first taste.
When I first baked these for my household, my teen boy called them "the tastiest thing you've ever made" and secretly tucked away two pieces for his school lunch tomorrow. There's just something about caramel mixed with chocolate that nobody can resist.
Key Ingredients and Helpful Selection Advice
- Butter - Pick unsalted so you can manage how salty the bars turn out
- Caramels - The individually wrapped soft ones work great; start unwrapping while your base bakes
- Chocolate Chips - Semi-sweet hits the right balance but milk or dark work too
- Peanut Butter - Smooth blends best in the caramel mix; go with whatever type you like
- Evaporated Milk - Makes the caramel layer just the right thickness
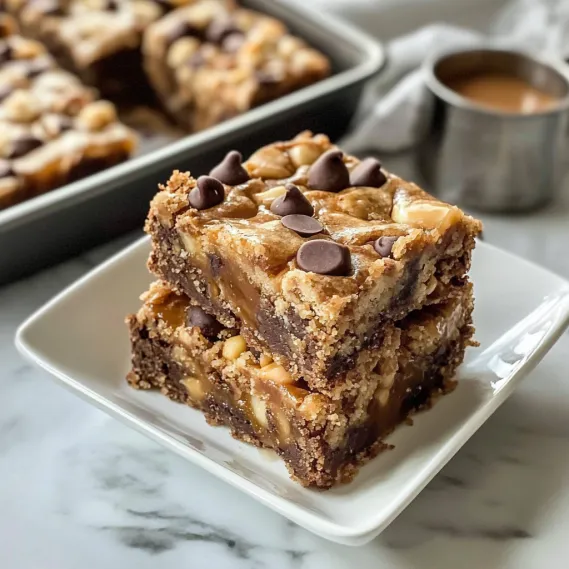
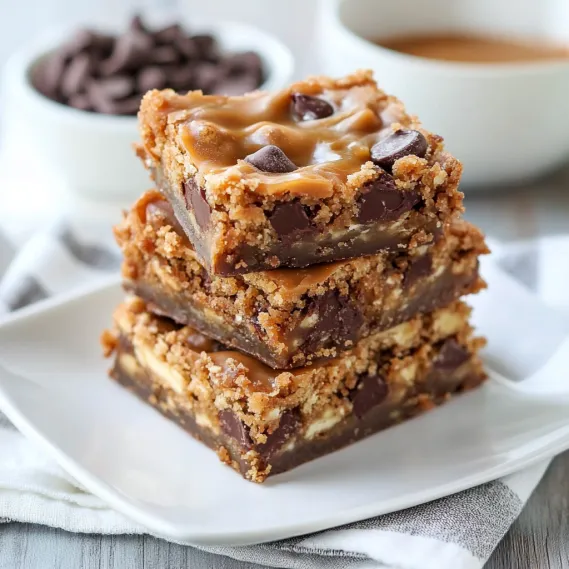
The real wow factor happens when that warm caramel meets the slightly baked cookie layer, making a gooey middle that tastes even better as it sits.
Step-by-Step Baking Guide
- Step 1:
- Get Everything Ready Heat your oven to 375°F and grease a 9×13 baking dish really well. Having your stuff measured out makes putting it all together much easier.
- Step 2:
- Create Your Cookie Mix In a big bowl, beat the soft butter with both kinds of sugar until it's fluffy, around 2-3 minutes. Add in vanilla, then mix in eggs one at a time, making sure each is well mixed. In another bowl, stir together flour, baking soda, and salt, then slowly add to your butter mix. Stir in chocolate chips just until they're spread throughout.
- Step 3:
- Bake The Bottom Part Put half your cookie dough across the bottom of your pan. It'll be pretty thin, so use a spatula or wet spoon to spread it out. Bake for 8-10 minutes until it's starting to set but not brown yet.
- Step 4:
- Make The Caramel Mix While that's baking, unwrap all your caramels and put them in a double boiler with evaporated milk. Melt them over medium heat, stirring often so they don't burn. Once it's smooth, mix in the peanut butter until you can't see it anymore.
- Step 5:
- Add Caramel To Base When your cookie base comes out, right away pour the hot caramel mix over it, spreading it evenly. Work fast since the caramel starts hardening as it cools down.
- Step 6:
- Add The Top Cookie Layer Drop spoonfuls of your leftover cookie dough on top of the caramel. Don't worry about covering it all - the gaps let the caramel show through and look pretty when it's done.
- Step 7:
- Bake It All Put the pan back in the oven for 15-20 minutes until the top turns light gold. The middle might seem a bit soft but it'll firm up while cooling.
- Step 8:
- Let It Cool Wait at least 1-2 hours before cutting. For super clean slices, stick it in the fridge for 30 minutes after it reaches room temp.
- Step 9:
- Cut Into Pieces Use a sharp knife dipped in hot water and wiped off between cuts for the best look. Make 24 squares for regular servings or smaller ones for bite-size treats.
- Step 10:
- Serve Them Up Enjoy at room temperature for the best gooey texture. Keep them in an airtight container with parchment paper between layers.
 Pin it
I found out how important greasing the pan is when my first batch stuck horribly. Now I use both cooking spray and parchment with extra hanging over the sides for easy lifting out.
Amazing Do-Ahead Sweet Treat
These bars get even tastier after sitting awhile as the flavors blend together. I usually make them a day before I need them for best results. For Saturday get-togethers, I whip them up Friday night, which gives plenty of cooling time. The texture gets just right overnight while the caramel gets an even deeper flavor. This makes them great for busy people who want awesome desserts without rushing around at the last minute.
Gift and Display Suggestions
For Christmas presents, I cut these into smaller squares and put them in pretty tins with parchment paper lining. I put waxed paper between each layer so they don't stick together. With a ribbon and small tag, they make fancy homemade gifts that friends ask for every year. For school fundraisers, I wrap each one in parchment and stack them on a wooden board to catch everyone's eye.
 Pin it
Fancy Occasion Twists
To match different celebrations, I add special touches depending on the event. For Valentine's Day, I sprinkle some pink sea salt on the caramel layer. Summer birthday parties get a drizzle of white chocolate on the cooled bars. During Christmas, I mix crushed candy canes into the top layer. For fall gatherings, adding a bit of cinnamon and nutmeg to the cookie dough brings nice warm flavors.
Kid-Friendly Changes
When making these for parties with kids, I sometimes swap out peanut butter for cookie butter because of allergies. Mini chocolate chips make the texture more even for picky kids. Setting up a "decorate your own bar" station with toppings like sprinkles, tiny marshmallows, or crushed cookies lets children make their own special squares, turning dessert into a fun activity everyone can enjoy.
Pro Baking Secrets
- Put parchment paper in your pan with extra hanging over for easy lifting
- Slightly undercook the base for perfect chewiness
- Try adding a cup of chopped pecans to the dough for extra crunch
- Always use a double boiler for melting caramel to avoid burning
- Cool in the fridge for 30 minutes before cutting for neat edges
I've figured out these tricks after many batches, especially after learning that using a double boiler makes the caramel way smoother than direct heat.
These Knock You Naked Bars have become what I'm known for at potlucks and family events. Something about the mix of textures - the slight crunch of the cookie outside giving way to sticky caramel and melted chocolate - makes everyone want more after just one bite.
 Pin it
Last-Minute Advice
- For a grown-up flavor, mix a teaspoon of espresso powder into the cookie dough
- Make a cool swirled pattern by moving a knife through the caramel before adding the top layer
- Experiment with different chips like butterscotch or white chocolate
- Use a plastic knife to cut chilled bars for surprisingly clean slices
- Let bars warm to room temperature before eating for the best texture
These rich treats show that sometimes the most impressive desserts don't need fancy techniques or weird ingredients - just the right combo of flavors and textures stacked together with a bit of love.
Frequently Asked Questions
- → Is caramel sauce a good replacement for melted caramels?
- Caramel sauce is usually more runny than melted caramels, so it might not hold its shape well. Stick with wrapped caramels for the best outcome.
- → What’s the sign these bars are fully baked?
- The top should look lightly golden brown, and the edges will start to pull away from the baking dish slightly.
- → Can these bars be frozen?
- Sure! Cool them completely, slice them, and layer them in an airtight container with parchment paper. They’ll keep well for up to 3 months.
- → Can I use something else instead of peanut butter?
- Of course! Swap it for almond butter or even cookie butter if you're looking for a new flavor twist.
- → Why are they called 'Naked' bars?
- The name is all about how ridiculously tasty they are. Folks say they’re so good, they’ll knock your socks off!