
 Pin it
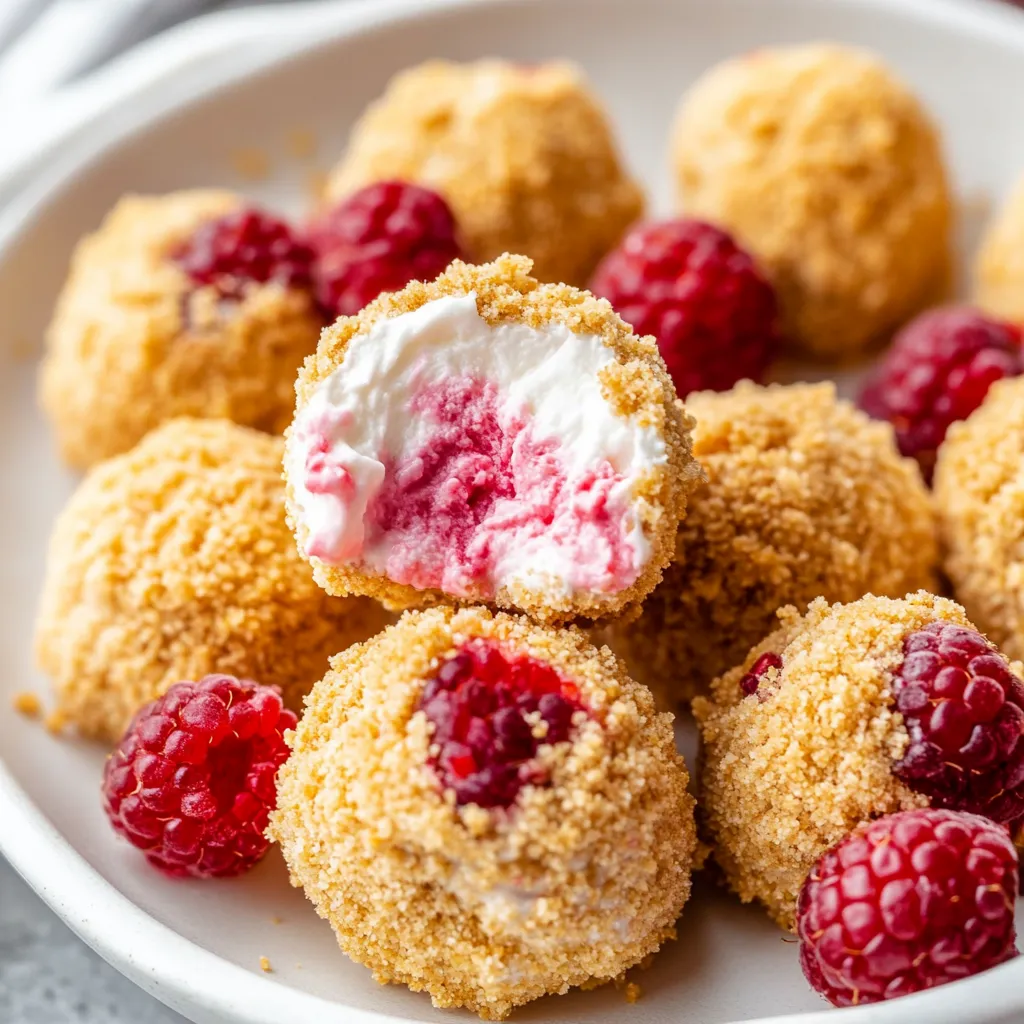
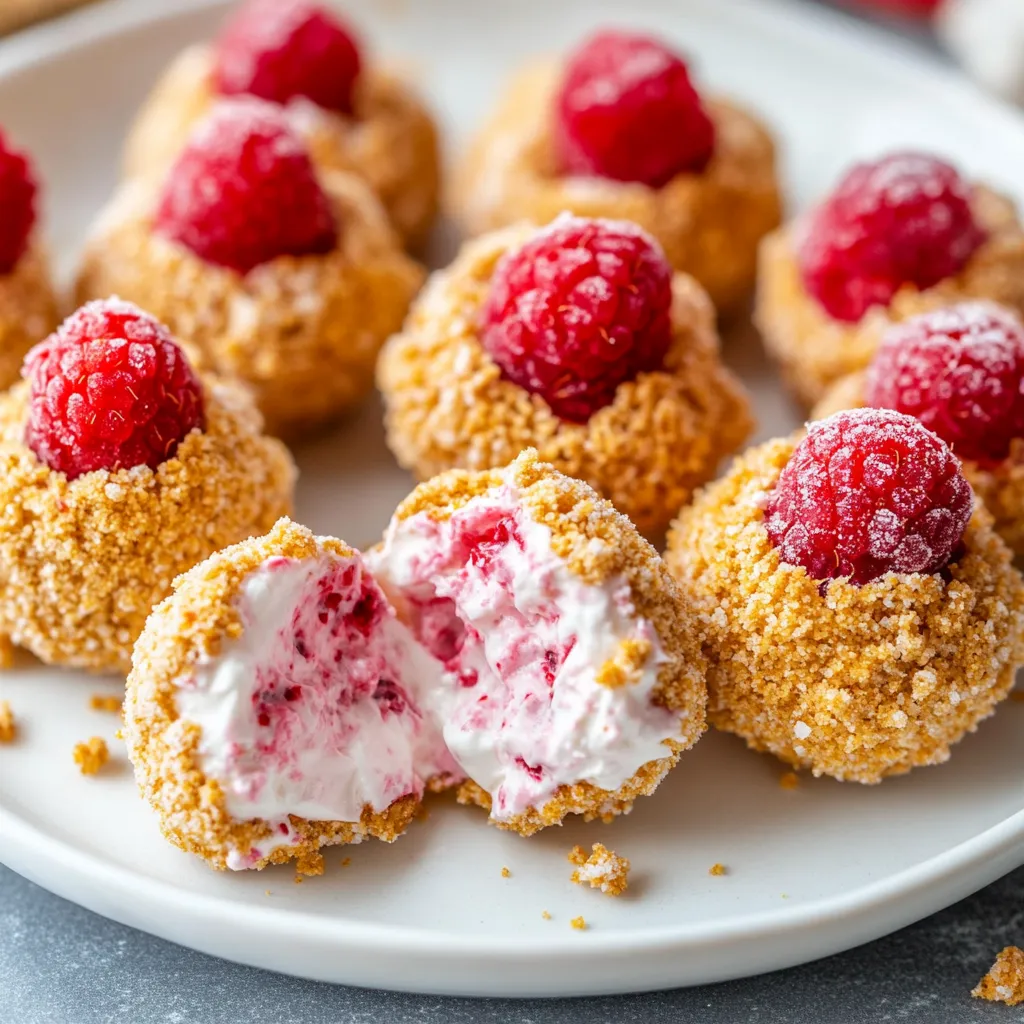
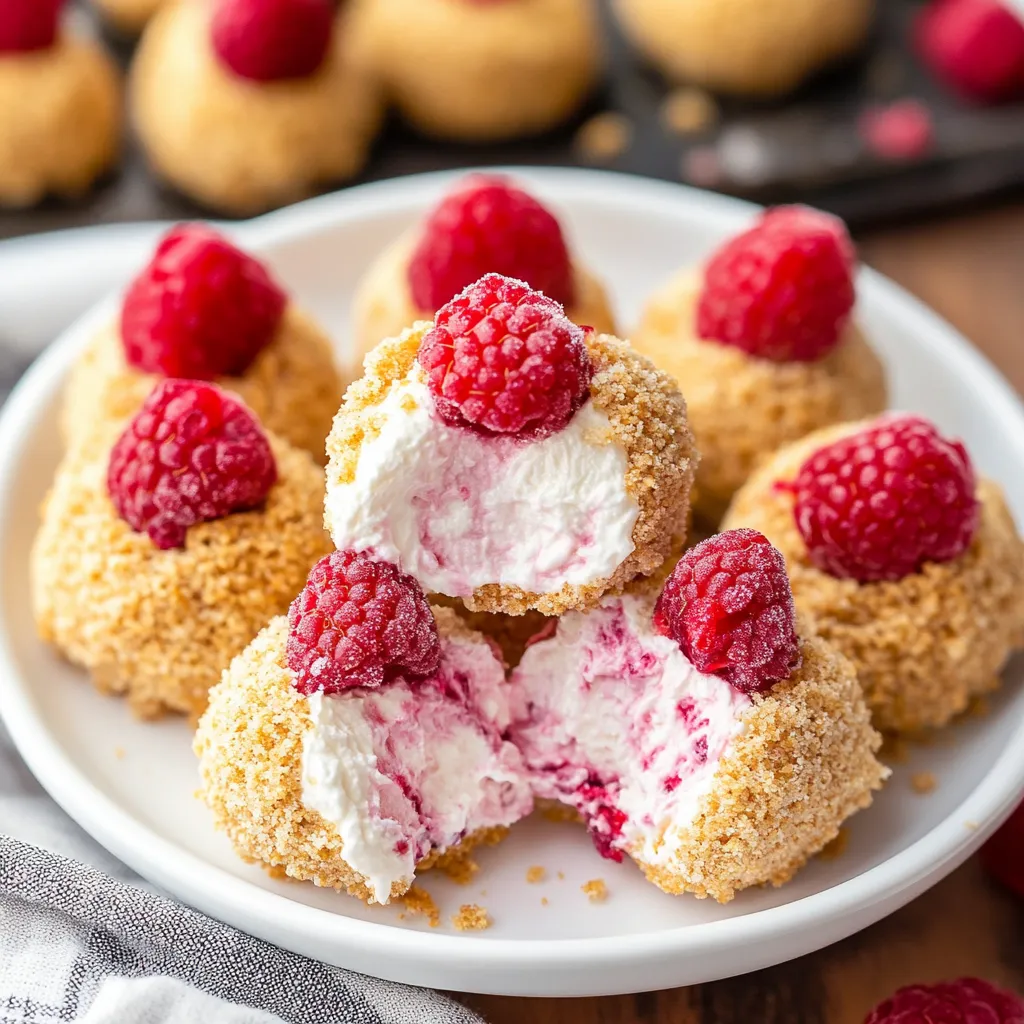
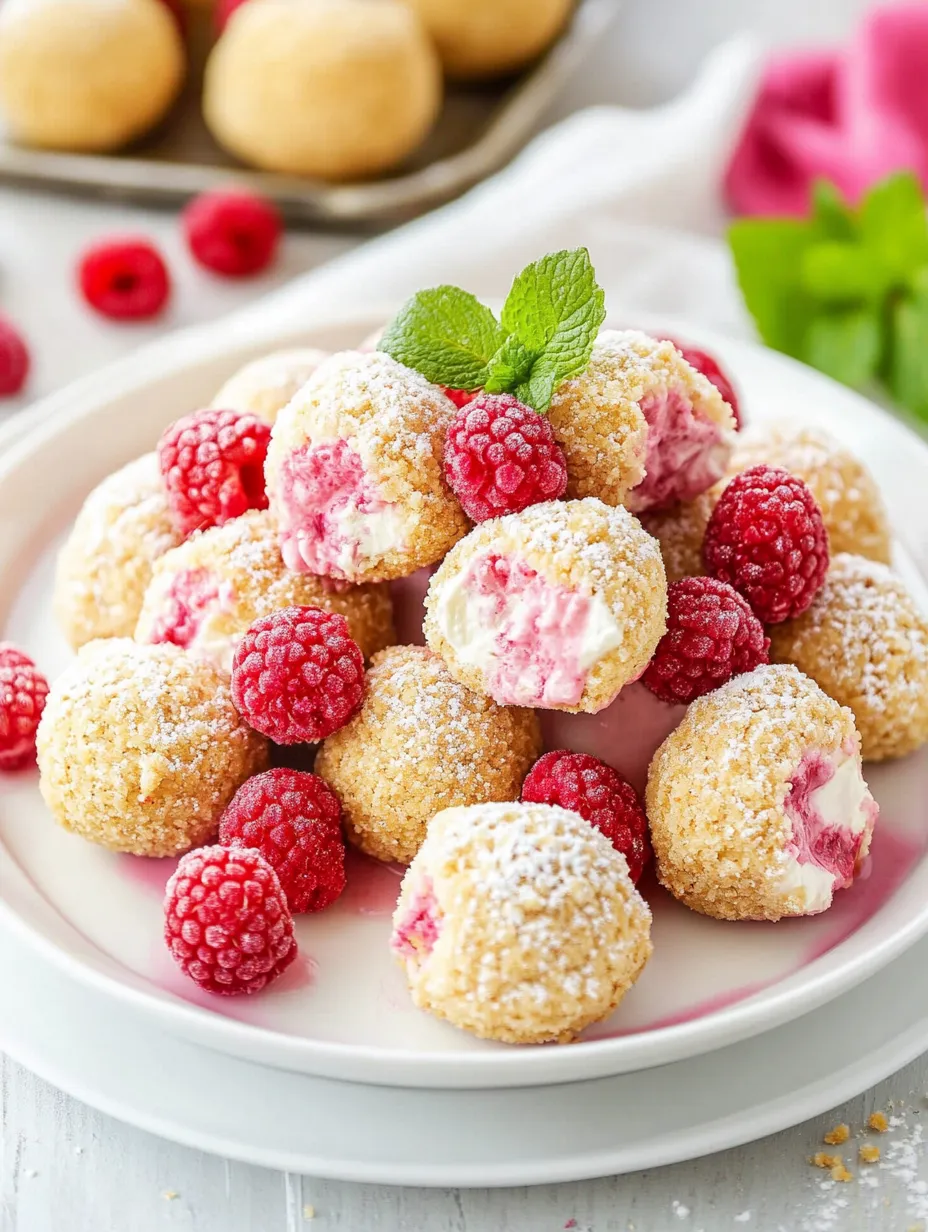
Frozen raspberry cheesecake nibbles mix the smooth creaminess of traditional cheesecake with the zesty pop of fresh raspberries all in a bite-sized frozen snack. These no-baking-needed treats showcase a velvety cream cheese mixture dotted with fresh fruit, coated in crunchy graham cracker bits for an amazing texture contrast.
During last year's summer, I brought these to my sister's backyard gathering. They vanished in moments, with everyone coming back to grab more. Being frozen makes them extra refreshing when temperatures soar.
Key Ingredients:
- Cream cheese - Go for regular full-fat Philly-type cream cheese for the creamiest results. Let it sit on your counter about 60 minutes to soften naturally
- Fresh raspberries - Look for bright, plump red berries with no mold spots. Really ripe ones will mix into the batter more smoothly
- Whipped topping - Gives structure and creates that airy, mousse-type feel. Make sure it's fully defrosted
- Graham cracker crumbs - Their gentle honey-sweet taste works beautifully with the tangy filling. Smaller crumbs coat everything better
- Granulated sugar - Cuts through the sharpness of berries and cream cheese without making things overly sweet
Step-by-Step Guide:
- Mix Your Cheesecake Foundation
- Whip the room-temp cream cheese till it's completely bump-free - you can't fix lumps later on
- Add sugar bit by bit while mixing so it blends smoothly
- Keep beating until everything looks silky with no visible sugar bits
- Add Your Berries
- Use a rubber spatula to fold raspberries in slowly
- Let some berries break up naturally - this makes pretty pink swirls throughout
- Don't stir too much or your mix might get too runny
- Build Texture
- Add whipped topping with slow, gentle folding moves
- Try to keep as much fluffiness as you can for the lightest results
- Make sure to scrape all parts of your bowl so everything mixes evenly
- Form and Roll
- Use cold mixture for best shaping results
- Grab a cookie scoop to make same-sized portions
- Roll each ball in graham bits right after you shape it
- Set them on a lined tray with gaps between each one
- Freeze Them
- Check that your freezer runs at 0°F or colder
- Keep your tray flat while moving it around
- Freeze them uncovered until hard, then move to a storage box
 Pin it
I really enjoy using just-picked local raspberries when they're available. My grandma always told me that berries picked at their best moment make any dessert better, and she wasn't wrong. You can really taste their natural sweetness in this mix.
These treats feel like the frozen cheesecake sticks my mom used to make when I was little, but they're way easier to put together. The graham cracker outside gives such a nice crunch that makes you want to keep eating them.
Every summer get-together at our place has these cheesecake bites. The kids especially love them and always want to help roll them in the graham crumbs. Watching how happy they get when they taste what they helped make just warms my heart.
I've tried loads of cheesecake recipes over the years, but these bites are now my favorite for any gathering. They bring together what everyone loves about traditional cheesecake but in a handy make-ahead frozen form. That perfect mix of creamy filling, fresh fruit, and crunchy coating just can't be beat.
Finding Great Raspberries:
Picking the right raspberries really matters for this mix. Go for ones that look bright red, feel firm but not hard, and come away from the core without trouble. They should smell sweet and fruity. Skip any with mold or mushy spots. When raspberries aren't in season, frozen ones work too - just thaw them completely and drain off extra juice so your mix doesn't get watery.
Managing Your Temps:
Getting these bites right depends a lot on temperature. Your cream cheese should feel soft enough to beat smooth but still cool when you touch it. The whipped topping needs to be just thawed but not warm. Working in a cool kitchen helps keep everything at the right thickness while you shape the bites. If your mix starts feeling too soft while you're rolling, stick it back in the freezer for 15-20 minutes before you keep going.
Changing The Texture:
One cool thing about this recipe is how easy it is to change the feel of it. Want it smoother? Blend up the raspberries before adding them. Like more chunks? Leave some raspberry bits bigger. You can play with the graham cracker coating too - crushing some pieces a bit rougher adds an interesting feel to each bite.
Do-Ahead Wonder:
These cheesecake bites are a busy host's dream because you can make them way before your event. Once they're frozen solid, they stay good for up to three months if stored right. This makes them perfect for making batches before big parties or keeping on hand for surprise visitors. Just remember to put the date on your container and eat them within the suggested time for the tastiest results.
 Pin it
Great Food Partners:
Try serving these bites with fresh mint leaves for color and a nice flavor match. They go really well with afternoon coffee or tea, especially darker coffees that balance out the sweetness. For fancy occasions, add a drizzle of raspberry sauce or serve them with some bubbly prosecco for an elegant dessert setup.
Fancy Finishing Touches:
While these bites taste great just as they are, you can dress them up for special events. Try pushing a single fresh raspberry into the top of each one before freezing them, or sprinkle with powdered sugar right before serving. If you love chocolate, a thin drizzle of melted dark chocolate makes them look amazing and adds rich flavor.
Keeping Them Fresh:
Storing these bites properly keeps them tasting their best. Put layers of parchment paper between them in an airtight container so they don't stick together. Keep them toward the back of your freezer where the temperature stays most steady. When you take some out to serve, quickly put the rest back in the freezer so they don't start thawing.
Perfect For Parties:
These bites fix many party dessert problems - they're easy to grab, don't need cutting or plates, and you can eat them without forks. Their size makes them great for dessert tables where folks might want to try several different treats. And they look fancy even though they're so simple to make.
 Pin it
Adjusting For Dietary Needs:
You can easily change these bites for different diets. For folks who can't have dairy, use non-dairy cream cheese and whipped topping. If gluten's an issue, swap in gluten-free graham crackers or try a nut-based crust made with almond flour and butter. Vegans can use plant-based cream cheese options and vegan whipped topping with a suitable crust. You can also use less sugar or sugar substitutes for people watching their intake. This recipe bends easily to fit almost any dietary need while still being super tasty.
In my years of making these raspberry cheesecake bites, they've always been a hit at every gathering. They hit that sweet spot between fancy and approachable, making them right for everything from family BBQs to fancy dinner parties. The secret is taking your time with each step and enjoying making these little bites of happiness.
Frequently Asked Questions
- → Can I try other berries instead?
- Of course! Feel free to swap raspberries with strawberries, blackberries, or even blueberries for a fresh twist.
- → How long can I keep these bites?
- As long as they're frozen in an airtight container, they'll stay fresh for up to three months.
- → Can I prep these days before an event?
- Definitely! These are great make-ahead desserts. Prepare them in advance and leave them frozen until serving.
- → What should I do if the mixture is too soft?
- Just pop it back into the freezer for about 15-20 minutes to firm it up before rolling.
- → Will low-fat cream cheese work?
- You can, but the full-fat variety gives you the creamiest texture and richest flavor.